Friday, May 2, 2025

What is Malware? And its Types,What Does Malware Do?Why Do Cybercriminals Use Malware?

Malware is malicious software and refers to any software that is designed to cause harm to computer systems, networks, or users. Malware can take many forms. Individuals and organizations need to be aware of the different types of malware and take steps to protect their systems, such as using antivirus software, keeping software and systems up-to-date, and being cautious when opening email attachments or downloading software from the internet.

What is Malware?

Malware is software that gets into the system without user consent to steal the user’s private and confidential data, including bank details and passwords. They also generate annoying pop-up ads and change system settings. Malware includes computer viruses, worms, Trojan horses, ransomware, spyware, and other malicious programs. Individuals and organizations need to be aware of the different types of malware and take steps to protect their systems, such as using antivirus software, keeping software and systems up-to-date, and being cautious when opening email attachments or downloading software from the internet.


What Does Malware Do?

Malware is designed to harm and exploit your computer or network. It can steal sensitive information like passwords and credit card numbers, disrupt your system’s operations, and even allow attackers to gain unauthorized access to your device. Some types of malware, such as ransomware, encrypt your files and demand payment to unlock them, while spyware monitors your activities and sends the information back to the attacker. Additionally, malware can spread to other devices on the same network, making it a significant threat. Protecting your devices with up-to-date antivirus software and being cautious about your open links and attachments can help mitigate these risks.

Monday, April 21, 2025

Differences between Hard disks and SSDs Explained,Advantages of Hard disksDisadvantages of hard disks

There are two types of hard disks: HDD and SSD. HDD uses mechanical parts to store data. SSD uses integrated circuits to store data. SSD drives are costly but provide higher data transfer speeds.

HDD

HDD stands for Hard Disk Drive. A hard disk contains spinning platters and a moving needle. Platters are circular disks made of a nonmagnetic material such as aluminum alloy, glass, or ceramic. They are coated with a thin layer of magnetic material on both sides that is used to store data.

The moving needle is called the head. It is used to perform read and write operations on platters. During this operation, the platters rotate at tremendous speed. The speed is measured in RPM. More RPM means more speed and cost.


Advantages of Hard disks

  • Hard disks are much cheaper than SSDs. At the price of a 256 GB SSD, you can buy a 1 TB HDD.
  • Hard disks are available in much bigger sizes than SSDs. You can easily buy an 8TB or a 16 TB hard disk from any local retailer or online store.
  • Hard disks contain mechanical parts that you can replace at any repair shop. For example, if a hard disk's head is damaged, you do not need to change the entire hard disk. You can replace only the head.
  • Hard disks provide a slower data transfer speed compared to SSDs.

Disadvantages of hard disks

  • Since hard disks use rotatory platters to save data, they make noise during reading and writing operations.
  • They are vulnerable to shock and sudden movement, which makes them a poor choice for laptops.
  • Since they contain moving parts, they are prone to damage.
  • SSD:

    SSD stands for Solid State Drive. SSDs use integrated circuits to store data. They do not contain any moving or magnetic parts. They use ICs that are fixed on PCBs. It makes them more durable, faster, and less prone to damage and corruption.

    There are two types of SSD: SATA SSD and NVme SSD. SATA SSD uses a SATA interface. NVMe SSD uses an NVMe interface. The SATA interface uses a SATA cable to connect the SSD drive to the motherboard. NVMe interfaces are directly mounted on the motherboard. You can call them NVMe slots. You need to attach NVMe SSD disks directly to these slots.

    ssd disk

  • Advantages of SSD

    • SSDs provide much higher data transfer speeds than HDDs.
    • Since they do not contain any moving or magnetic parts, they are less prone to damage.
    • They are more secure than the traditional HDDs.

    Disadvantages of SSD

    • They are more expensive than HDDs.
    • Bigger size SSDs are not easily available. You have to purchase them directly from manufacturers or distributors.
    • Since it does not contain any repairable parts, you have to replace the entire disk if it is damaged.
    • ===============================================
    • "This Content Sponsored by Buymote Shopping app
    • BuyMote E-Shopping Application is One of the Online Shopping App
    • Now Available on Play Store & App Store (Buymote E-Shopping)
    • Click Below Link and Install Application: https://buymote.shop/links/0f5993744a9213079a6b53e8
    • Sponsor Content: #buymote #buymoteeshopping #buymoteonline #buymoteshopping #buymoteapplication"
    • ===============================================

Wednesday, April 16, 2025

History of "School of Business Organization (SBO) Pvt Ltd Company

The School of Business Organization (SBO), based in Tiruvannamalai, Tamil Nadu, presents itself as a private initiative aiming to transform graduates into entrepreneurs by providing skills, business opportunities, and a basic income. ​


Company Overview

  • Name: School of Business Organization Private Limited

  • Incorporation Date: February 15, 2024

  • Corporate Identification Number (CIN): U85499TN2024PTC167614

  • Registered Address: T.S. No. 2/128, 129, Ramamoorthy Nagar, Tiruvannamalai, Tamil Nadu – 606601

  • Directors: Pichandi Sankar and Arjun Ravi

  • Authorized & Paid-up Capital: ₹1,00,000

  • Company Status: Active

Vision and Mission

  • Vision: To transform every graduate in India into a businessperson, moving away from the traditional roles of workers or job seekers.

  • Mission: To organize graduates by providing them with skills, business opportunities, a basic income, and instilling a sense of social responsibility.

Services and Programs

SBO offers a range of services aimed at fostering entrepreneurship:​

  • Educational Support: Providing resources and guidance to graduates to develop entrepreneurial skills.

  • Cloud Storage Services: Offering digital storage solutions to simplify data management.

  • Affiliate Partner Program: Collaborating with individuals to promote products or services, allowing affiliates to earn commissions on sales generated through their referrals.​sboweb2.org.in

Contact Information


=====================================================================

#SBO #SBOTVM #SBOGROUP #BUYMOTE #EDUQUEST #SBOFAKE #SBOSCAM #SBOFRAUD #SBOCHEATING #SBODIGITALMARKETING

Buymote:https://play.google.com/store/apps/details?id=com.Buymote.buymas&pcampaignid=web_shareEduquest :https://eduquest.courses/=============================================================================​

Monday, April 14, 2025

Embedding Audio Files from Google Drive into HTML,Get the Streaming Link,Convert to a streaming link

 Initially I had planned to create a Sound Cloud account to host the audio. Sound Cloud isn't really used for this sort of big brain music (sarcasm), but it's a great place to put your audio files where they're easily accessible. It looks like Sound Cloud was having some kind of authentication issue at the time and I was unable to create my account. My second plan also fell through, as it seems you can't host audio files for streaming on cloud Drive. Yes, I'm a shameless Apple user. No, it doesn't always work out for me.

In the end, I decided the best proxy solution would be to host the files on Google Drive. After some digging through Stack Overflow, I found the magic sauce to get embedded audio files.

Upload Your Files

You need to get your files into Google Drive. You'll need to upload all the codecs you may want users to be able to play.


The contents of my Google Drive after uploading some audio files.

Set Up Sharing

For each audio file, you'll want to turn on "anyone with a link" access. Right-click on the file and select "Get link".


Then click the dropdown shown and select "Anyone with a link".

Get the Streaming Link

This one is the annoying one. In the above image, click the "Copy link" button to copy the link to your clipboard, and then put it in a text file. Now take a look at that link (yes, I'm comfortable with you seeing a real link):

https://drive.google.com/file/d/166jxMcfmhUAevwj7QGz5HizLJ-cRj73T/view?usp=sharing

You'll see the link includes some kind of file identifier in it. In the link here, the format is: https://drive.google.com/file/d/<THIS_IS_THE_ID>/view?usp=sharing. This link is not currently streamable, but with the id we can create the link that is.

Convert to a streaming link

Take your existing link:

https://drive.google.com/file/d/<THIS_IS_THE_ID>/view?usp=sharing

And change up everything but the ID:

https://docs.google.com/uc?export=download&id=<THIS_IS_THE_ID>

You now have a streamable link!

Add Your Audio

You now have all the tools necessary to craft your embedded audio player. All modern browsers support the <audio> HTML tag, which gives you a player without having to create an iframe or anything else more complicated. Now, inside the HTML of your site, put the following code block (remember to substitute the id of the file in Google Drive):

<audio controls>

    <source src="https://docs.google.com/uc?export=download&id=<THIS_IS_THE_ID>" />

    <p>Your browser doesn't support the audio HTML tag.</p>

</audio>

1234

What will this do? It'll create a simple audio-playing interface for the user, pointed at your audio file in Google Drive. If the user's browser doesn't support the <audio> tag, it'll instead display the text in the <p> tag. I found the Apple documentation website the most useful for understanding how the tag works.

You should now have a working audio player on your website!


I performed the above steps 3 times to get 3 different audio players.

Advanced Audio

It turns out not every browser can support every audio format. The format you record in is not necessarily a format that your user's browser can play.

From some very brief digging, there seem to be 3 basic categories of web browser

1.      Supports AAC, MP3, and MP4 audio

2.      Supports audio, but probably only WAV files

3.      Doesn't play audio files

We don't actually care about the last category, because they'll figure it out on their own. And the first category is very, very small. All the mainstream browsers on mainstream operating systems fall into the first category.

So while you may see that I have multiple encodings of the same audio file in my images above, I really only have to attach one to my post to get the most traction with my users: the m4a file (which is an audio-only MP4 file).

But if you think you may have some nonstandard users on your site, you may want to encode your audio in a few other codecs. Ogg Vorbis and WAV files should typically capture all the users out there.

Working with multiple formats

If you do want to give your users a choice of audio format, you can encode that into your <audio> tag in the HTML.

<audio controls>

    <source src="<MY_OGG_FILE>" type="audio/ogg" />

    <source src="<MY_MP4_FILE>" type="audio/mpeg" />

    <source src="<MY_WAV_FILE>" type="audio/wav" />

    <p>Oops, something went wrong</p>

</audio>

123456

The browser will go through the list of audio sources in order and find the first one that it thinks it can play. If I load up the page in Safari, it'll see the type="audio/ogg" in the first source and know to not even try to download it. But when it encounters the type="audio/mpeg" source, it'll try to load that.

Generally you should keep your largest files the furthest down the list: your users will appreciate it if they don't have to download massive files to play your audio.

Transcoding audio

To get your audio into different formats, you'll need to download a program to do the conversions for you. I'm using MacOS, but I've been using freac for my transcoding needs even though it looks like a horrific early-2000s Windows program. I think the program is pretty self-explanatory, and it should give you the ability to pretty quickly create new files in different formats.

 ========================================================

"This Content Sponsored by Buymote Shopping app

BuyMote E-Shopping Application is One of the Online Shopping App

Now Available on Play Store & App Store (Buymote E-Shopping)

Click Below Link and Install Application: https://buymote.shop/links/0f5993744a9213079a6b53e8

Sponsor Content: #buymote #buymoteeshopping #buymoteonline #buymoteshopping #buymoteapplication"

=======================================================

Monday, April 7, 2025

Recycle Bin Tricks and Tips for Windows 11/10 :Restore deleted items from Recycle Bin

The Recycle Bin in Windows! It’s there; we need it, but we hardly ever notice it. Some of us don’t even empty it, letting Windows do the job once it starts overflowing. Well, let’s change that, and let’s take a closer look at it today! Let’s see how it works and how we can get the best out of it in Windows 11/10.

Windows Recycle Bin Tricks and Tips

The Recycle Bin is just that! It lets you recycle deleted items. Once you delete any file or folder from the Windows File Explorer, it is moved and placed into this bin. It is not deleted as such.


To delete an item, you right-click on it and select Delete. This will move the file or folder to the Recycle Bin. If you press the Shift key and Delete, then the item will not be moved into the Recycle Bin. It will be directly deleted permanently.

Monday, March 31, 2025

How to Recover Deleted Files from Recycle Bin? Learn from Here! Recycle Bin Recovery in Windows & Mac

Most of you may suffer from the wrong deletion. If the deleted files are sent to the Recycle Bin, you can recover them easily. But if you have emptied the Recycle Bin, do you know how to recover deleted files from the Recycle Bin? You can find effective ways in this MiniTool post.

A Closer Look at Recycle Bin

As a computer user, you must be familiar with Recycle Bin, which is used frequently when you perform deletion action on the hard disk. But do you know exactly what is Recycle Bin? Before we try to recover deleted files from the Recycle Bin, let’s have a closer look at this practical tool.

The so-called Recycle Bin is a system folder included in the computer. It is mainly used to temporarily store deleted hard drive files.

Recycle Bin in Windows

In general, files, folders, pictures, shortcuts, and Web pages deleted from hard drives are frequently found in Recycle Bin and those files will be kept there until we further delete them/empty the recycle bin or until the total size of deleted data exceeds the maximum limit.

As you can see from the above content, you can get data recovery done easily if you delete valuable data carelessly before files are further cleared from the Recycle Bin.

Indeed, you’re able to use and manage Recycle Bin in a good way and configure it to be more personalized.

Trash in Mac

Like the “Recycle Bin” in Windows, Mac also has a similar unit called “Trash”, which is also mainly used to save deleted files in a computer, offering you a regrettable chance. After clicking on the icon of Trash Bin in the Dock, you will see a Finder window opening on the computer screen. In this way, all the files it contains will be displayed in front of you.

To be honest, with Trash, Mac users are allowed to put the icons they don’t want to hang around on their hard drives in convenient and easy ways.

Since you have known specifically about Recycle Bin, let’s go to the problem: How to recover deleted files from Recycle Bin. When you delete files by mistake, the first thing is to check the Recycle Bin. If the file is in the Recycle Bin, you can recover it directly. If not, you need to seek data recovery software’s help.

Recycle Bin Recovery in Windows & Mac

As far as I’m concerned, deletion is an ordinary operation you’ve depended on very much. Well, if the files, folders, or programs are deleted by mistake, how could you get them back with ease?

When you find your valuable data is deleted by mistake, you must make up your mind to complete data recovery, right? However, you may not know exactly how to do it. Let’s tell the truth – different measures should be taken in different situations.

In this part, I’ll focus on telling you the specific steps to recover deleted files without using any software.

3 Ways to Recover Deleted Files from Recycle Bin in Windows

Keep reading to learn how to recover files deleted from the Recycle Bin in 3 ways in Windows.

Way 1: Perform Ctrl + Z

This simple shortcut key combination means to undo the last action. You can use it to recover the file you just deleted. If you want to recover one deleted file after performing several actions, this method doesn’t work.

Please note files that are permanently deleted can’t be restored by pressing Ctrl + Z.

Way 2: Use the Restore feature in the Recycle Bin

Step 1: Open Recycle Bin to find the wanted files/folders.

Step 2: Select the files and right-click on them.

Step 3: Choose Restore from the context menu. You can also click on the Restore the selected items choice on the top toolbar.


Way 3: Drag the files out of Recycle Bin

Step 1: Open Recycle Bin and find your wanted file.

Step 2: Left-click on it and drag it to the destination location directly.

Monday, March 24, 2025

Why EXE File Gets Deleted Randomly? How to Stop the Deletion? Reasons for EXE Files Loss

There is a strange phenomenon that EXE files get deleted randomly in Windows operating system. If this is your case, don’t panic. This post from MiniTool focuses on the issue lost EXE files, analyzing the reason for EXE file loss and providing solutions to stop EXE file loss.


EXE files being deleted randomly is weird but not uncommon. Searing Microsoft Community for the keywords “lost EXE file”, we found lots of results and extract two displayed below.

Reasons for EXE Files Loss

The most apparent reason for the issue “lost EXE file” is antivirus settings or virus or malware infection. Most of the viruses or malware are delivered through executable files, and the antivirus programs always make most of the executable files suspicious and block or even delete them.

Aside from the above reason, other possible causes can also cause EXE file loss and they are privilege issues, system glitches, and so forth.

Restore EXE Files

When EXE files disappear from a folder, don’t panic and you can first try restoring them. There are three ways to restore EXE files:

  • Restore EXE files from Recycle Bin.
  • Restore EXE files from the previous version.
  • Restore EXE files with MiniTool Partition Wizard.

Restore EXE Files from Recycle Bin

First, see if the EXE file has been put into Recycle Bin. Double-click the Recycle Bin icon on your desktop, look for and right-click the executable file, and choose the Restore option. The file will be restored to the original folder.

If the file is not in Recycle Bin, please perform the next way to restore EXE files.

Restore EXE Files from Previous Version

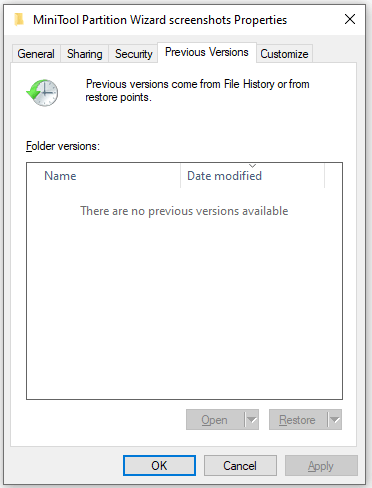
You can try to restore files or folders if you have enabled the previous version. The previous version is the copy of files or folders that Windows automatically creates as part of a restore point. So, when you lost EXE files, try to restore them from the previous version.

To do so, a few clicks are required. First, right-click the folder where you used to save the .exe files, and choose the Restore previous versions option. Then, choose a file edition you need from the pop-up window if there are several previous versions available and click the Restore option. Finally, click the Restore button on the confirmation window to restore the folder to the selected version.

If there is no previous version created, please try the last way to restore the lost EXE files.


no previous versions available

Restore EXE Files with MiniTool Partition Wizard

MiniTool Partition Wizard is a professional data recovery tool that is excellent at recovering lost data and partitions. Besides, it is also a disk cloning tool that enables you to clone a disk or partition easily.

Here the data recovery tool is highly recommended as it can help you recover the lost EXE file and other files deleted automatically on Windows.

Well, how to restore EXE files with this MiniTool program? The guide is below.

Youtube Channel Image
Nadaipazhagu Tamizhaa Subscribe To watch Videos
Subscribe