
There is a strange phenomenon that EXE files get deleted randomly in Windows operating system. If this is your case, don’t panic. This post from MiniTool focuses on the issue lost EXE files, analyzing the reason for EXE file loss and providing solutions to stop EXE file loss.
EXE files being deleted randomly is weird but not uncommon. Searing Microsoft Community for the keywords “lost EXE file”, we found lots of results and extract two displayed below.
Reasons for EXE Files Loss
The most apparent reason for the issue “lost EXE file” is antivirus settings or virus or malware infection. Most of the viruses or malware are delivered through executable files, and the antivirus programs always make most of the executable files suspicious and block or even delete them.
Aside from the above reason, other possible causes can also cause EXE file loss and they are privilege issues, system glitches, and so forth.
Restore EXE Files
When EXE files disappear from a folder, don’t panic and you can first try restoring them. There are three ways to restore EXE files:
- Restore EXE files from Recycle Bin.
- Restore EXE files from the previous version.
- Restore EXE files with MiniTool Partition Wizard.
Restore EXE Files from Recycle Bin
First, see if the EXE file has been put into Recycle Bin. Double-click the Recycle Bin icon on your desktop, look for and right-click the executable file, and choose the Restore option. The file will be restored to the original folder.
If the file is not in Recycle Bin, please perform the next way to restore EXE files.
Restore EXE Files from Previous Version
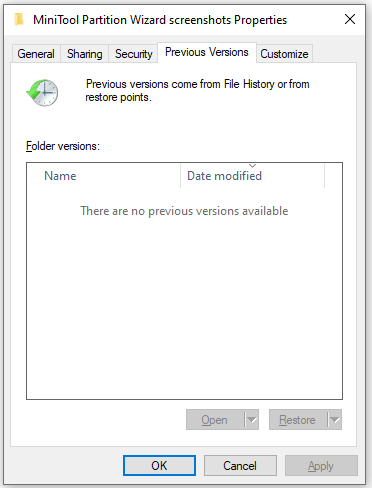
You can try to restore files or folders if you have enabled the previous version. The previous version is the copy of files or folders that Windows automatically creates as part of a restore point. So, when you lost EXE files, try to restore them from the previous version.
To do so, a few clicks are required. First, right-click the folder where you used to save the .exe files, and choose the Restore previous versions option. Then, choose a file edition you need from the pop-up window if there are several previous versions available and click the Restore option. Finally, click the Restore button on the confirmation window to restore the folder to the selected version.
If there is no previous version created, please try the last way to restore the lost EXE files.

Restore EXE Files with MiniTool Partition Wizard
MiniTool Partition Wizard is a professional data recovery tool that is excellent at recovering lost data and partitions. Besides, it is also a disk cloning tool that enables you to clone a disk or partition easily.
Here the data recovery tool is highly recommended as it can help you recover the lost EXE file and other files deleted automatically on Windows.
Well, how to restore EXE files with this MiniTool program? The guide is below.
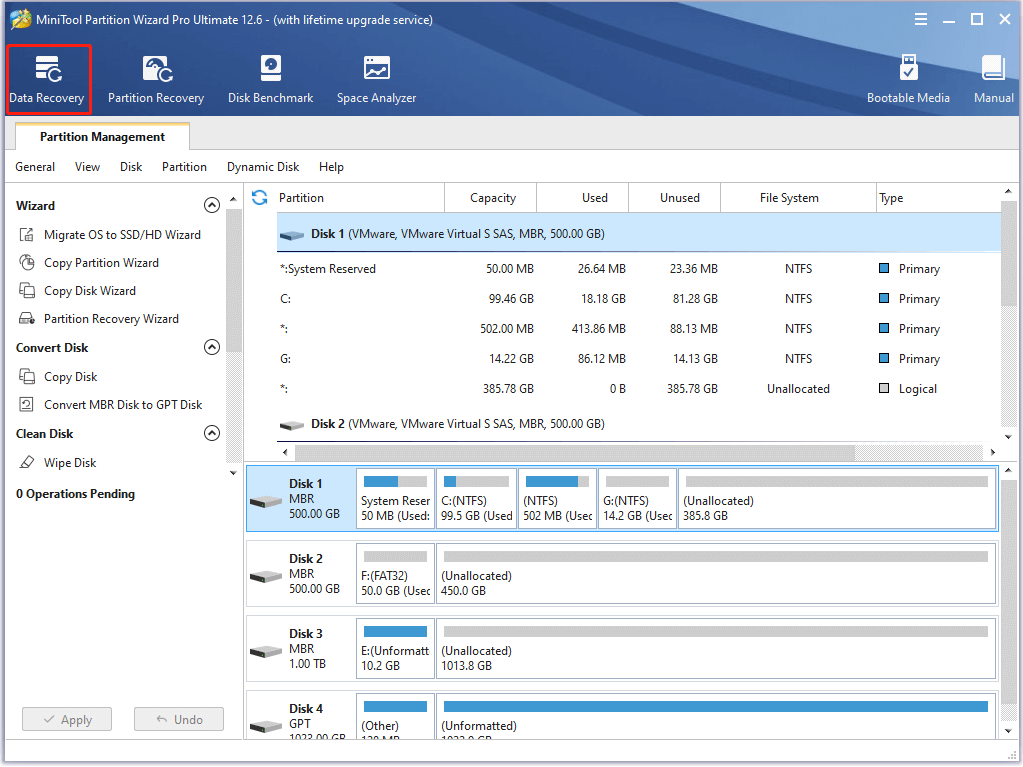
Step 1: Launch MiniTool Partition Wizard to access its graphical interface.
Step 2: Click the Data Recovery feature at the top of the interface.
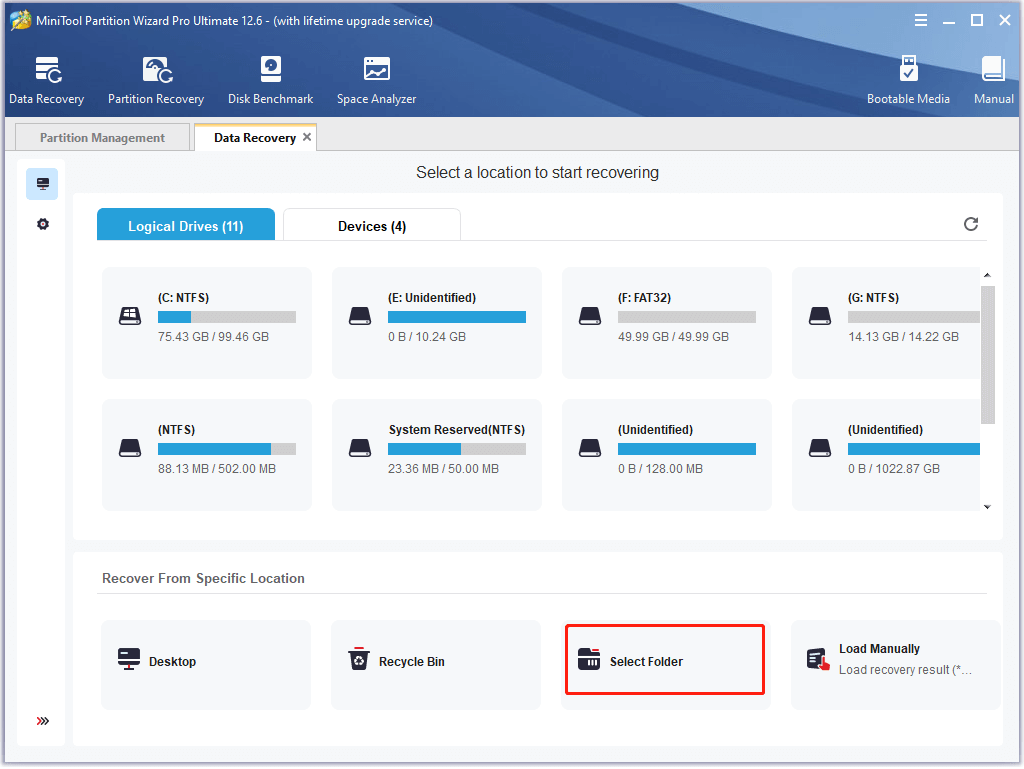
Step 3: After accessing the Data Recovery interface, look for the Recover From Specific Location area, move your cursor over the Select Folder option, click the Browse button, and choose the folder where you used to save the lost EXE files. After that, the MiniTool program begins to scan the selected folder and find the lost files.
Step 4: Wait for the scanning process to end and find the lost EXE files in the recovery result.
Step 5: Tick the checkbox for the EXE file you want to restore and then click the Save button.
Solutions to Stop EXE Files Loss
Some solutions to the issue “EXE files automatically deleted Windows 10” are displayed below. Try them right now.
Fix 1: Check Your Antivirus
When viruses or malware break into your computer and they may start deleting EXE files from your computer on their own. So, when you find that your EXE files disappear suddenly, please check if your computer is infected by viruses or malware.
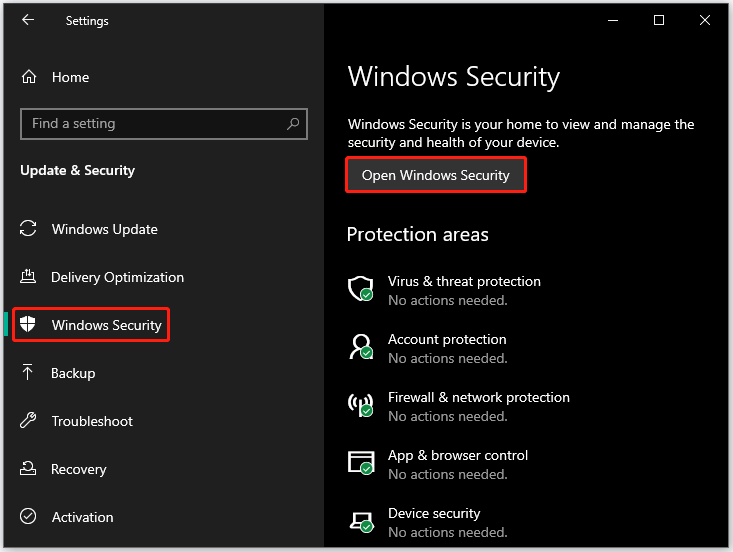
You can complete this fix through the Windows built-in tool: Windows Defender:
Step 1: Press Windows + I to open Windows Settings. Then, go to the path on the Settings window: Update & Security > Windows Security > Open Windows Security.
Step 2: Click the Quick scan button under Current threats. Alternatively, click the Scan options option and choose Full scan, Custom scan, or Microsoft Defender Offline scan.
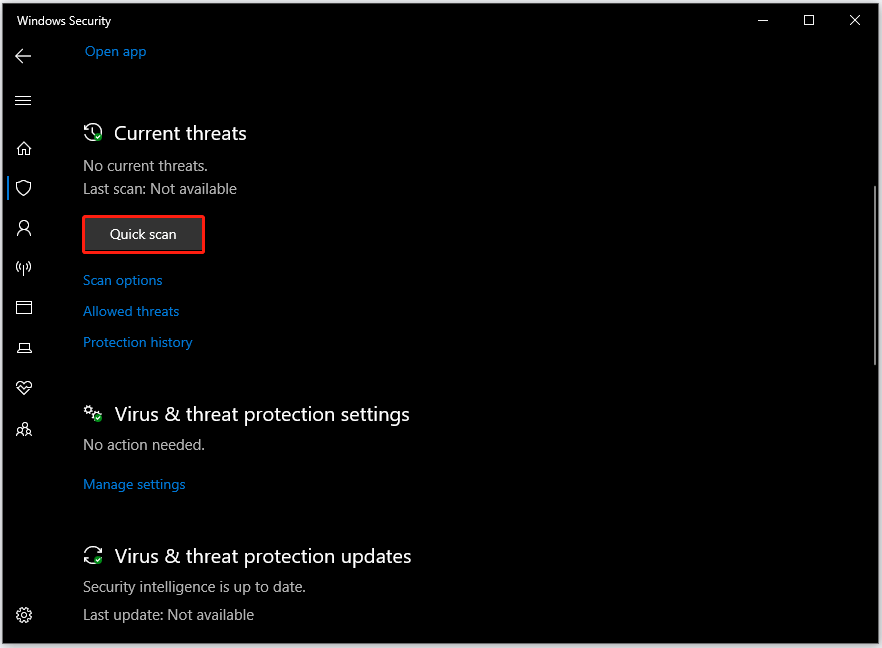
Step 3: Wait for the scanning to end and preview the result. And follow the on-screen instructions to complete this fix.
Fix 2: Exclude the EXE File from Antivirus
Adding the EXE file to the exception list may stop Windows 10 from deleting this file, and here is how to do that:
Step 1: Open Windows Security again.
Step 2: Under the Virus & threat protection tab, click the Manage settings option on the right side and then click the Add or remove exclusions under Exclusions.
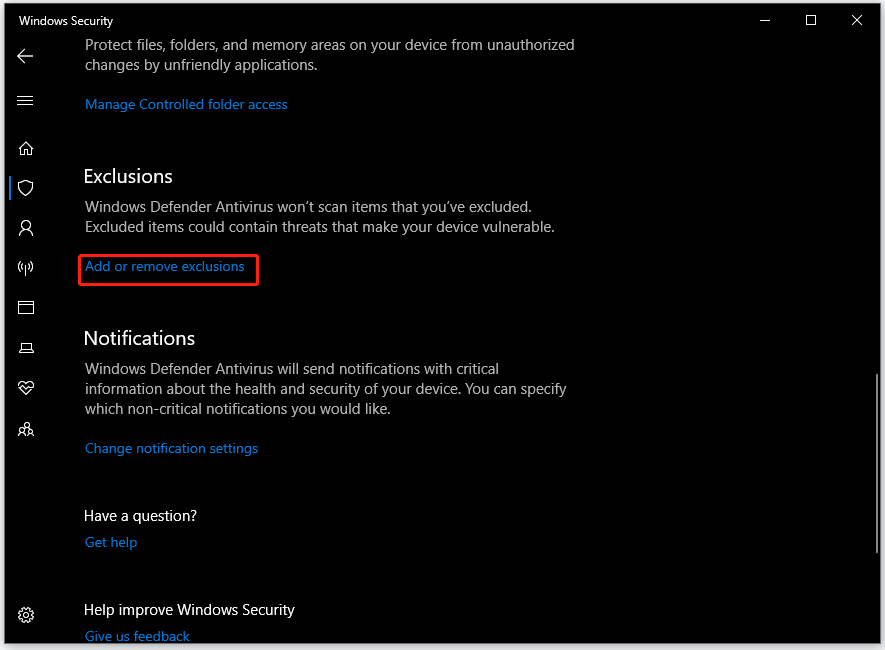
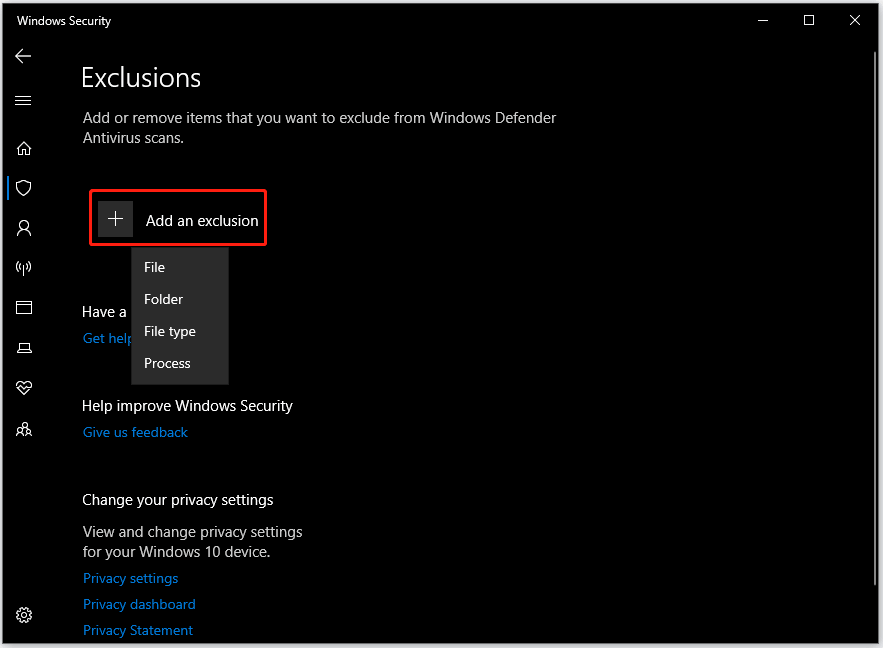
Step 3: Click the plus icon next to Add an exclusion and then choose the option: File, Folder, File type, or Process to add the lost EXE file to the exclusion list.
For more information on this fix, please switch to the post Something You Should Know on Windows Defender Exclusions.
Generally, the issue “EXE files automatically deleted Windows 10” can be fixed through the above two ways. If you still find EXE files missing on Windows 10 after performing them, please continue to perform the following fixes.
Fix 3: Try Using Safe Mode
Step 1: Open Windows Settings by clicking the Windows icon on the taskbar and hitting the gear icon on the Start menu.
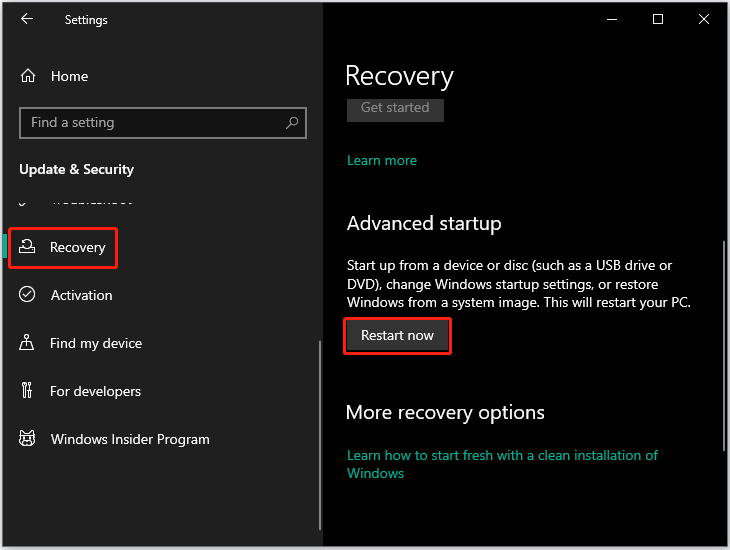
Step 2: Click the Update & Security option on the Settings window.
Step 3: Switch to the Recovery tab and then click the Restart now button on the right pane.
Step 4: Go to the path: Troubleshoot > Startup Settings > Restart.
Step 5: Choose the version of Safe Mode you need to use from the list by pressing the corresponding keyboard key.
Step 6: Observe if the issue exists. If it does not appear, please copy or extract the EXE file.
Fix 4: Run the EXE File as an Administrator
Running the app as an administrator is also a way to fix the issue “EXE files automatically deleted Windows 10”. To do so, you just need to right-click the restored EXE file and choose the Run as administrator option. See if the app runs well and the EXE file will disappear.
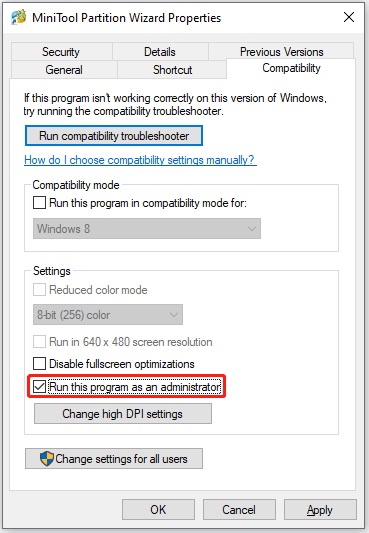
If everything goes as expected, that’s great. But note this fix is temporary, and you need to reperform this fix every time you want to run that EXE file if this fix is helpful. So, here we suggest that you force the app to run with administrative privileges through the following steps:
- Right-click the EXE file and choose the Properties option from the context menu.
- Navigate to the Compatibility tab on the Properties window and check the checkbox for the Run this program as an administrator option.
- Click the Apply > OK buttons to save this change.
Fix 5: Create a New User Account
Next, try creating a new user account if you have ever encountered the issue “EXE files automatically deleted Windows 10”.
Step 1: Open Settings and choose the Accounts setting.
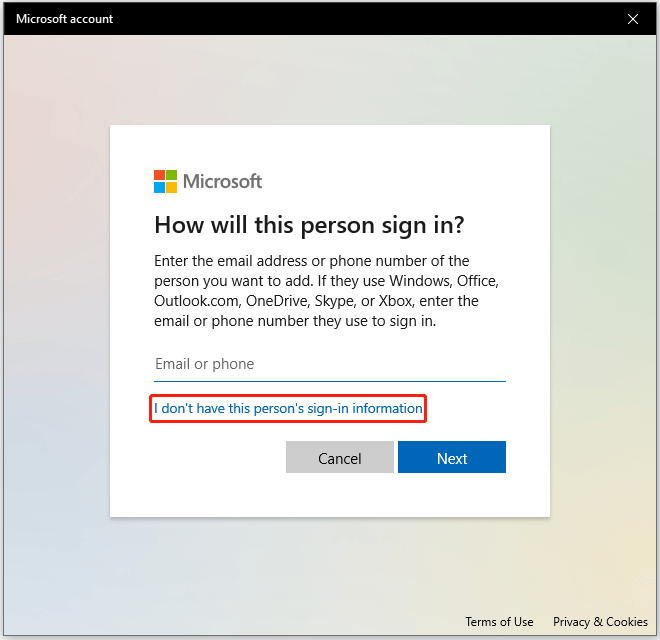
Step 2: Head over to the Family & other people in the left pane and click the Add someone else to this PC option.

Step 3: Click the I don’t have this person’s sign-in information option on the Microsoft account window. After that, click the option called Add a user without a Microsoft account.
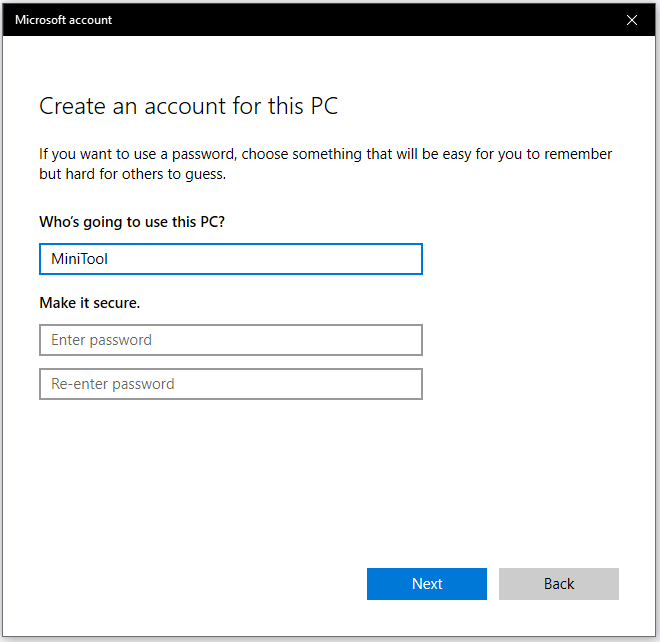
Step 4: Enter the username and password for the new account and click the Next button.
Step 5: Switch to the newly created account and see if the issue is fixed.
=========================================================
"This Content Sponsored by Buymote Shopping app
BuyMote E-Shopping Application is One of the Online Shopping App
Now Available on Play Store & App Store (Buymote E-Shopping)
Click Below Link and Install Application: https://buymote.shop/links/0f5993744a9213079a6b53e8
Sponsor Content: #buymote #buymoteeshopping #buymoteonline #buymoteshopping #buymoteapplication"
==========================================================================

No comments:
Post a Comment